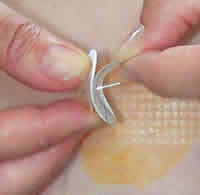
There are a wide variety of Infusion Sets available. Many have an adhesive surface that sticks to the skin. Shown to the right is a Rapid set which has a small 90-degree needle that’s easy to install. In this example, a paper covering is removed from the adhesive surface before placing it through the IV 3000 dressing on the skin.
Some pumps have a reservoir or cartridge in which insulin is loaded directly from an insulin bottle. Others have a bladder into which insulin is injected through a port, a chamber that is loaded with insulin and then placed into the pump, or space for standard 3 ml insulin pen cartridge to be placed into the pump. Refer to your pump manual for instructions on how to put insulin into your pump reservoir or bladder and how to prime the infusion line.
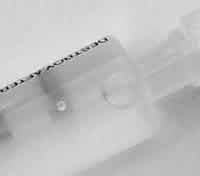
Pumps with a plastic reservoir or cartridge are coated with a lubricant that provides a tight seal between the O-rings and the barrel of the reservoir. When a reservoir is stored for a while, the lubricant may pool at the bottom of the reservoir. This increases the chance of insulin leaking into the area between the O-rings.
Even a small leak can cause a rapid loss of control. Replace the reservoir with another one if liquid, mist or bubbles are noted between the O-rings.
To avoid O-ring leaks, recoat the reservoir wall with lubricant prior to use. Free the plunger and push it completely into the barrel. Rotate the plunger a couple of times to recoat the O-rings; then carefully pull it back and forth 2 or 3 times in the reservoir to recoat the barrel. This redistributes the lubricant onto the O-rings and reservoir wall to help prevent this type of leak.
After following the O-ring procedure, fill the reservoir with insulin. Get rid of air bubbles in the reservoir by holding the reservoir in the palm of your hand and pointing the needle up with the air bubble toward you. Tip the reservoir so the bottom or plunger end is slightly farther away than the needle end. Flick the reservoir with a fingernail or pen until the air bubble enters the neck of the reservoir. Then squirt insulin into the insulin bottle to get rid of the air bubble.
Little champagne bubbles are harder to get rid of, but they are harmless. Larger bubbles can displace a significant amount of insulin and should be eliminated. If air bubbles are seen in the infusion line, an inch of air in the line is equal to half a unit of insulin. In most cases, up to an inch of air in the line is not of concern.
Detach the needle from the reservoir and immediately replace it with the hub on the infusion set. When tightening, grip the reservoir at the hub. To avoid hub leaks, be sure that the connection between the infusion set and the reservoir has been firmly tightened.
Look closely for any sign of an insulin leak between the O-rings. Replace the reservoir if any liquid, mist or bubbles are noted. Even seemingly small leaks in this location can cause a rapid loss of control.
Place the reservoir in the pump. Recheck the O-rings and then give 2 unit boluses until insulin can be seen exiting from the tip of the infusion set.
You are now ready to insert the infusion set.
Pump Preparation Links:
Infusion Sites | Sterilize Your Site | Insulin & Dressings | Infusion Set and Reservoir Prep | Insert the Infusion Set
Last Updated on May 11, 2020